
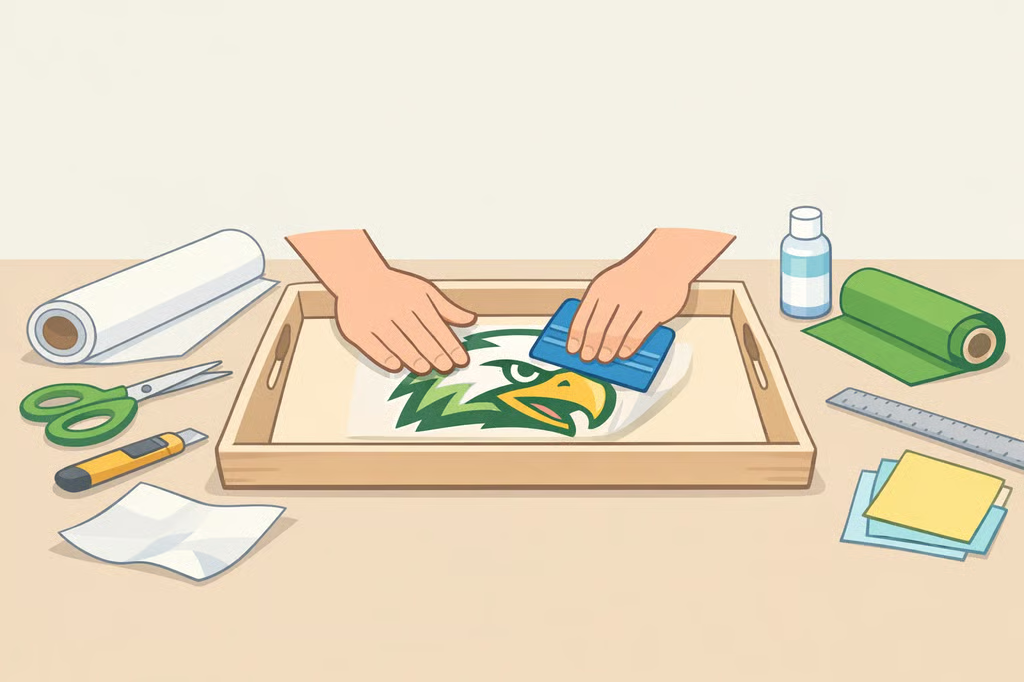
- DIY College Logo Tray: How to Make a Vinyl Display Tray
- What you'll need before you start
- Choose your build path for a DIY college logo tray
- Confirm logo permission before you cut
- Measure the tray and size the design
- Build a vinyl college logo tray step by step
- Troubleshoot vinyl, paint, and adhesion problems
- Scale up: build a personalized college tray for a club or fundraiser
- Care for a finished custom college gift tray
- Next steps before the first work session
DIY College Logo Tray: How to Make a Vinyl Display Tray
A DIY college logo tray is a manageable school-spirit project for a parent volunteer, club adviser, student, or booster group member working with a modest budget and basic tools. This guide walks through building one tray, from a cleaned or plain surface to a finished vinyl design, and covers what changes if a group needs several trays at once. It's a decorative tray project, meant for a shelf, coffee table, or gift table rather than a food-prep surface, and that distinction shapes both the materials list and the care instructions at the end.
One crafter cut a school mascot from adhesive vinyl on a Silhouette machine and applied it to a tray she found for $3 at a dollar store, her own example of cost and simplicity rather than a guaranteed price (Rachel Teodoro). A separate wood-tray tutorial describes the vinyl-cutting process as beginner-friendly and doable in an afternoon, with no power tools needed beyond the cutting machine itself (We Can Make That, about 8 months ago). Starting from a ready-to-decorate blank tray tends to fit that afternoon timeline; starting from a tray that needs refinishing adds cure time that can stretch the project past a single sitting, covered in the build steps below.
What you'll need before you start
Gather these before buying anything else:
- Tray (new blank tray, or thrifted/plain wood)
- Degreaser such as Goo Gone, plus sandpaper, for a used or unfinished tray
- Cutting machine and permanent adhesive vinyl, or a pre-cut decal, or painter's tape for a stencil
- Regular transfer tape
- Paint or stain, only if refinishing
Choose your build path for a DIY college logo tray
Three starting points cover most projects:
- Finished blank tray, machine-cut vinyl. Likely the quickest of the three, since it skips sanding, painting, and any cure time beyond the vinyl transfer itself.
- Thrifted or unfinished wood tray. Needs cleaning, possibly sanding, and a refinishing coat that has to dry and cure fully before vinyl goes on (Reinvented Delaware, about 15 months ago).
- No cutting machine. A licensed decal or a simple painter's-tape stencil skips the machine step, at the cost of design complexity.
The build steps later in this guide walk through the full process, covering paths 1 and 2 together, and note where path 3 branches off.
The table below breaks down what else to decide before buying anything.
Decision Path A Path B Tray source New blank tray: typically ready to decorate without sanding or curing Thrifted or plain wood tray: needs cleaning and possibly sanding (Reinvented Delaware, about 15 months ago) Cutting method Cricut or Silhouette machine loaded with permanent adhesive vinyl Pre-cut licensed decal, or a hand-cut painter's-tape stencil for a single-color design Intended use Display only (shelf, gift table) Food-adjacent serving: check the finish and every product label before letting food or drinkware touch the tray Distribution One personal gift Sale, fundraiser, or organizational distribution: check with the university licensing office first (see next section)
A thrifted or bare wood tray needs a wash with hot, soapy water and a degreaser like Goo Gone if there's sticky residue, followed by another rinse to clear the oily film (Reinvented Delaware, about 15 months ago). A pre-cut decal or stencil path limits the design to something simpler, usually a single color, and a purchased decal has to follow that product's own transfer instructions.
Decide the tray source, cutting method, intended use, and distribution now. The last two answers matter most, because they shape what happens in the next section.
Confirm logo permission before you cut
This section explains general practice, not legal advice; the craft tutorials behind this guide are not trademark or licensing sources. University trademark and licensing pages typically explain how a school's logos, mascots, and wordmarks may be used, and the terms differ from one university to the next. Because policies vary by school, check the specific university's official trademark or licensing page, usually listed under terms like "brand," "trademark," or "licensing," before using an official logo for a club project, fundraiser, sale, or organizational distribution.
A single gift tray made for a family member is a smaller undertaking than a tray produced for sale or under a club or booster group's name, but the same page is worth a quick look either way before ordering vinyl in an official mark. If a club, class, or booster group plans to distribute trays under an organization's name, contact the licensing office directly, describe the exact plan (gift, display, or sale), and ask whether a written answer is available.
If a written answer isn't ready before the work session, some crafters sidestep the question by using school colors, initials, or an original design instead of reproducing an official logo. That's a workaround for keeping the project moving, not a guarantee that any specific design avoids trademark concerns, so it's still worth confirming with the licensing office once an answer comes through.
Measure the tray and size the design
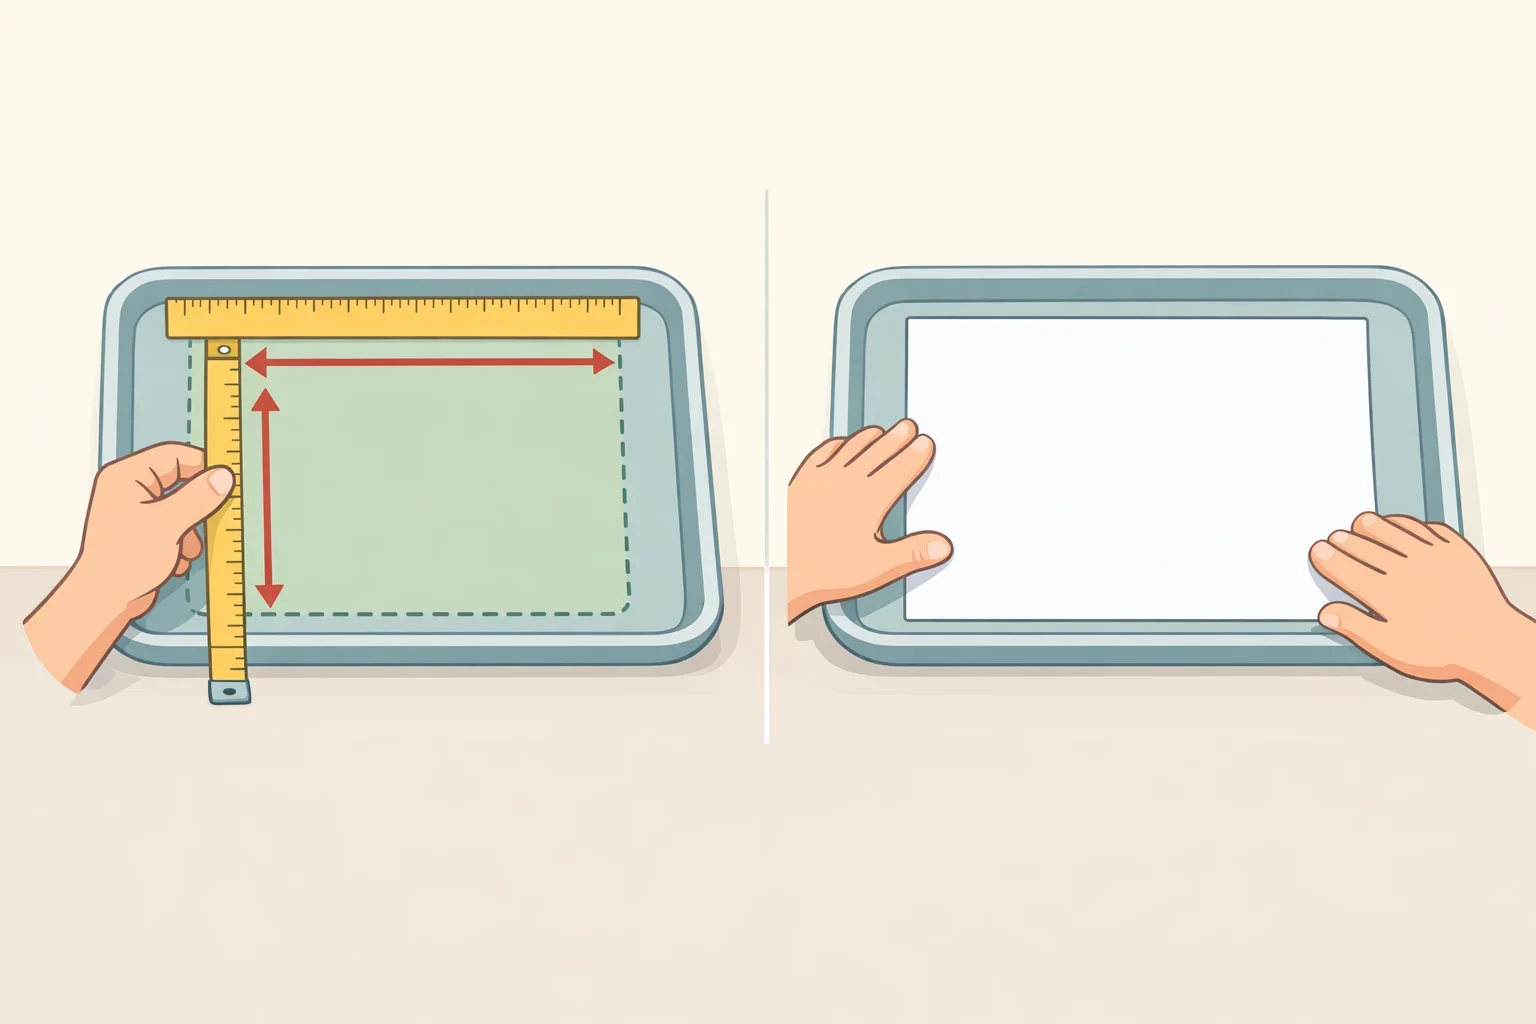
Before cutting any vinyl, spend a few minutes with the tray itself instead of relying on the file's default dimensions.
- Measure the tray's usable flat surface, staying inside any rim, lip, or handle, since that's the area the design actually has to fit.
- For a lower-risk first attempt, leave a visible margin between the design and the tray's edges or handles.
- Cut the design from paper at full size and lay it on the tray before touching the vinyl. This extra check catches sizing or placement problems for free, before any material gets used.
- Look over any small lettering or fine mascot detail in the file. Thin lines are worth a second glance, since a mistake is easier to fix on paper than on cut vinyl.
- Write down the final, approved dimensions once placement looks right. That measurement carries over directly if a batch run happens later.
Build a vinyl college logo tray step by step
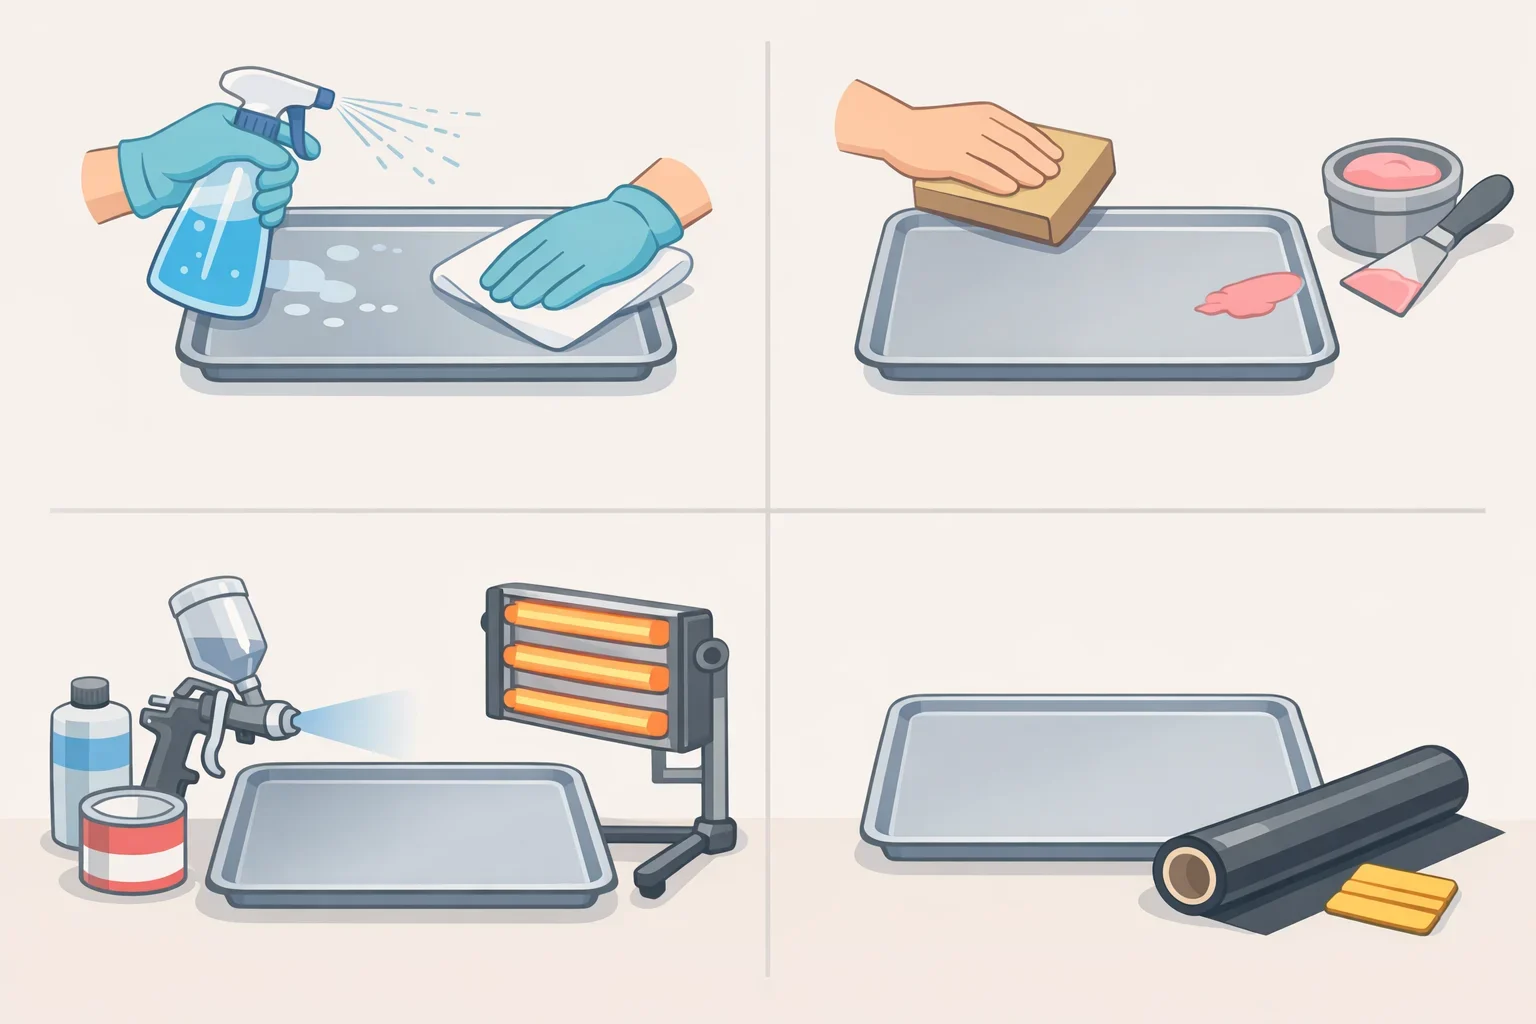
These six steps cover the full process from a tray that needs cleaning or refinishing. Working from a finished blank tray? Skip ahead to step 4, wiping the tray clean first if it needs it. Steps 1 through 3 apply only if the tray needs cleaning, sanding, or a paint or stain refresh.
- Clean the tray, if it's thrifted or unfinished. Wash it thoroughly with hot, soapy water. If there's sticky residue, treat it with a degreaser such as Goo Gone, then rewash with soap and water to clear the oily film before it dries (Reinvented Delaware, about 15 months ago). The surface should end up dry and grease-free.
- Sand only if the surface is glossy or rough. Sand a shiny finish until it's dull, smooth any rough wood edges, wipe away the dust with a damp paper towel, and let it dry completely (Reinvented Delaware, about 15 months ago; We Can Make That, about 8 months ago). Skip this step entirely on a smooth, finished blank tray.
- Paint or stain if refinishing. This step is optional. Apply thin, even coats and let each one dry before adding the next (We Can Make That, about 8 months ago). Check the paint or stain label for its stated dry and cure time before moving to vinyl; "dry to the touch" isn't the same as fully cured, and that timing varies by product, which is why this path may not wrap up in a single session.
- Place the mock-up, then cut the approved logo. Lay the paper mock-up from the measuring step on the tray one more time to check placement, then upload the file as an SVG, resize it to the dimensions already measured, and cut it from permanent adhesive vinyl without mirroring the image, since this is vinyl applied directly rather than heat-transfer vinyl (We Can Make That, about 8 months ago). For a first cut with a given machine or a new roll of vinyl, running a small test scrap through first is a reasonable way to catch a setting that needs adjusting.
- Weed the design. The tutorial behind this step recommends working toward the open side of letters for faster weeding (We Can Make That, about 8 months ago).
- Transfer the vinyl. Burnish it onto regular transfer tape, press it firmly onto the tray, then peel the tape away slowly for a clean edge (We Can Make That, about 8 months ago). The design should lie flat with no lifted corners once the tape comes away.
Working from a pre-cut decal or a stencil skips the cutting machine altogether. A purchased decal follows that product's own transfer instructions, and a hand-cut stencil gets taped in place, painted through in thin coats, and left to dry fully before the tape comes off.
Troubleshoot vinyl, paint, and adhesion problems
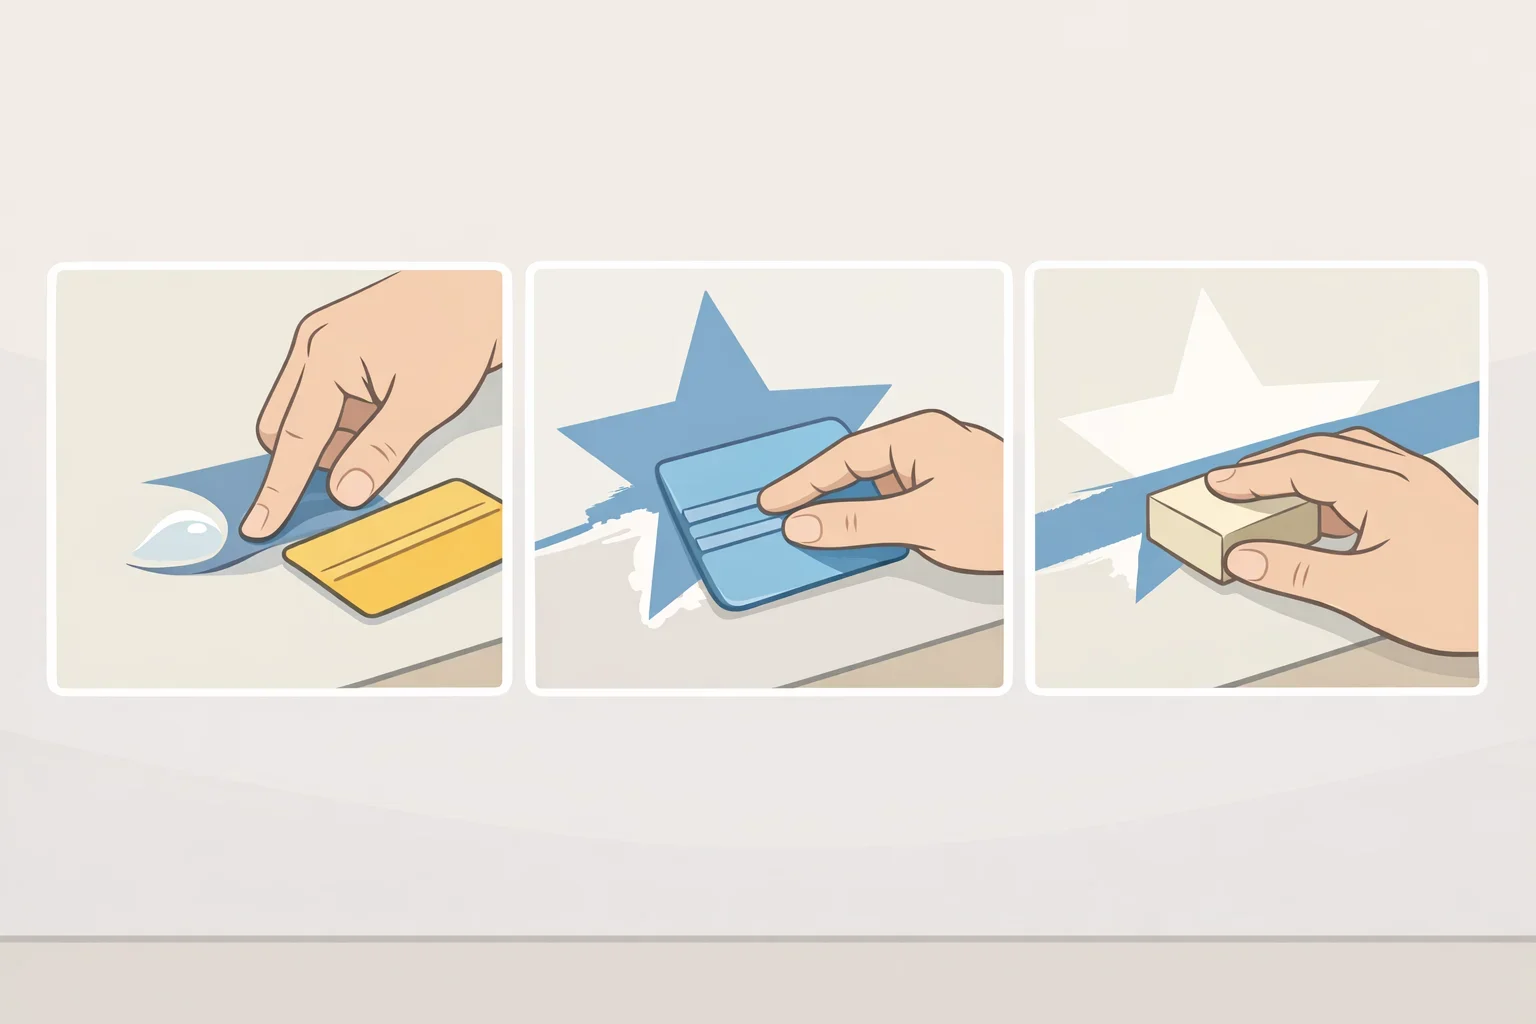
- Vinyl lifting at the edges is worth checking against two likely culprits first: a surface that wasn't fully clean or cured, or a transfer that wasn't pressed firmly enough. Press it down again with even pressure across the whole design; if it still lifts, check the vinyl manufacturer's instructions for compatibility with that surface. Permanent vinyl is recommended for trays that get handled often (We Can Make That, about 8 months ago), though that recommendation doesn't guarantee adhesion on every finish.
- Bubbles or wrinkles under the vinyl are worth trying to smooth by pressing from the center outward toward the edges with a scraper or an old gift card.
- Paint bleeding under the tape line is easier to prevent than fix. Pressing the tape firmly along its edge before painting helps (We Can Make That, about 8 months ago); if it happens anyway, lightly sand the spot and add another thin coat instead of starting over.
- Sticky residue that survives the first cleaning typically needs a second round: reapply a degreaser and rewash with hot, soapy water before sanding or painting (Reinvented Delaware, about 15 months ago).
Scale up: build a personalized college tray for a club or fundraiser
Building more than one tray works best with a prototype first. Build and check a single tray before cutting vinyl for the rest of the batch: confirm the logo's size against the tray, check that the vinyl adheres cleanly, and total up the real cost. Testing one tray this way is a reasonable step for catching a sizing or adhesion surprise before committing materials to the rest of the run.
If students are helping produce a batch of personalized college trays, the project also gives them practice measuring, budgeting, and thinking through a licensing question. Split the work: one student measures the tray's usable surface and resizes the logo file, one tracks a simple per-tray cost using the group's actual receipts (tray, vinyl, transfer tape, and any paint or handles, divided by the number of trays), and one documents each step with photos for the club's records. Confirm ahead of time whether the school requires adult supervision for cutting-machine use or advance approval for a fundraiser sale.
Afterward, have the group write down what they'd change next time, whether that's sizing, cost, or timeline, as a reference for the next batch.
Before buying materials for a batch, run through this list:
- Design approved by the university's licensing office, in writing if possible
- Tray dimensions measured and logo file resized to match
- One prototype built and checked for fit and adhesion
- Per-tray cost calculated from actual receipts
- Cutting machine access and any required adult supervision confirmed
- Distribution plan matches the permission that was obtained
- Care instructions ready to hand off to each recipient
Care for a finished custom college gift tray
Treat the finished tray as display-only. Skip placing unpackaged food directly on it unless the manufacturer documentation for every layer, the vinyl, any paint, and any sealer, specifically permits that use.
Keep it dry and wipe it by hand instead of soaking it. One crafter described the outdoor gloss vinyl she used as waterproof and weather-resistant (Rachel Teodoro), but that's her description of one product line, not a food-safety certification, and it doesn't carry over to every vinyl type or finish.
Next steps before the first work session
Work through this short list before buying anything:
- Get the university licensing office's answer for the exact use, in writing if the office allows it
- Check the paint or stain label's stated cure time if refinishing
- Measure the tray's usable surface and size the design to fit, with margin from edges and handles
- Build a single prototype first if more than one tray is planned
Bring those four items to the first work session, and the steps above cover the rest.